
Part 0: About
Hi, I’m angela, and I’m putting this guide together as what I consider a simple, foolproof way to clear all of the story bosses in Atelier Lulua. It’s not meant as an “ultimate set” or anything of the sort, it’s based around a specific strategy and the gear is simplified down to a level where it should be easily reproducible and fairly easy to follow. Hopefully that is actually the case!
This guide is intended for bosses from chapter 9 onward, and will work for all of them very easily.
Feel free to leave comments if any part is confusing!
Part 1: Recipes
Recipes you will need (you probably already have most of these):
Gnardi Ring
- Alchemyriddle Chapter 3.7
- Defeat Rock Puni
- arls national mine
- Gather Mountain Pearl
- arls national mine w/ mining bomb
Healing Bell
- Alchemyriddle Chapter 5.7
- Purchase the book “Alchemy of Materials”
- Smithy in Arland
- Synthesize Tinc
Living Rope
- Alchemyriddle Chapter 6.1
- Synthesize Hay
- Defeat Shadow Arch
- Quelei Forest
Scale Cloth
- Purchase the book “The Art of Burning Soul”
- Smithy in Arland
Locket of Friendship
- Alchemyriddle Chapter 7.4
- Purchase the book “Gem Mysteries”
- Silver Chisel Jewelry Shop in Arklys
- Synthesize Komet
Black Mist Symbol
- Alchemyriddle Chapter 7.6
- Gather Black Runestone
- Ster Highlands
- Gather Glow Grass
- Izuko Beach
Super Mining Bomb
- Alchemyriddle Chapter 7.7
- Synthesize a Mining Bomb at 100+ quality
- Blow up rocks 25 times
- Hart Outpost is good
Olgenrium
- Alchemyriddle Chapter 9.1
- Gather Divine Iron Piece
- Super Mining Bomb at Fire’s Domain: Deep Depths
- Gather Glittery Water
- Break Barrels at Izuko Beach
Jar of Four Spirits
- Alchemyriddle Chapter 10.1
- Can be done during Chapter 9
- Gather Fairy Segment
- Break pots at Fire’s Domain: Deep Depths
- Defeat Blood Elemental
- Fire’s Domain: Deep Depths
Part 2: Gathering
Most of the gathering for your equipment will be done at Fire’s Domain: Deep Depths. You can get a lot of high-tier traits and materials here, so it’s the perfect spot.
You can see the gathering route you should take here (link is timestamped): (World Record 5/19/2020) Atelier Lulua CHARISMA in 6:27:47
You will need a Super Mining Bomb for the rainbow crystals at the end.
Make sure to also grab the black rock nodes for Star Piece if you don’t have any.
Run this route 3-5 times and you should have everything you need; if you find out you’re missing something while synthesizing then just come back and gather some more.
Other Materials
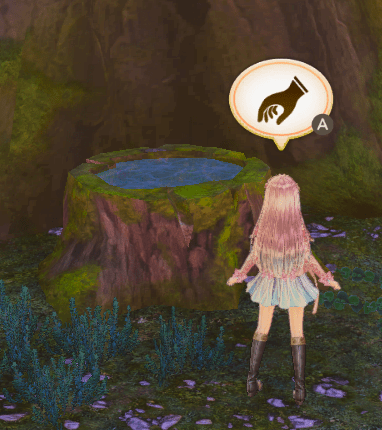
Ointment Water from Eternal Spring: In Front of the Spring
- Gather from the tree stump well (pictured)
Forest Dew from Guiding Light Forest
Mountain Pearl from Arls National Mine
- Alternatively, purchase from Silver Chisel in Arklys
Wheat from Golden Plains
Dragon Piece
- Dragon at Fellsgalaxen: Fourth Floor
- Shop at Arland Fair during December (5000 cole)
Dragon Horn x2
- Dragon at Fellsgalaxen: Fourth Floor
- Dragons at Ster Highlands: Summit
Dragon Meat
- Dragons at Ster Highlands: Summit
Boost Items
- Twinkle Flower x2
- Blazing Earth Element x2
- Crackling Earth Element x2
- Blazing Thunder Element
Money
Quite a bit of Cole is required for this (25-30k or so?), and that’s on the cheap end for gear. If you find yourself running short on money, then go and do requests. Mostly gathering and synthesis requests - combat requests aren’t worth it except for the one to kill like, Golden Puni.
Once you’re out of requests you can turn in, simply go back to the Atelier and sleep for 10 days. This will refresh them. I usually only bother turning in requests I already have the materials for.
Requests get more annoying after completing B-rank promotion, so if you haven’t done it yet, don’t. You can still get the good easy ones if you have, they’re just more rare.
I recommend registering a few items to get the most out of your request turn-ins:
- Quality 48+ Nectar
- Quality 73+ Bomb
- Quality 40+ Lightning Bomb
These are requested fairly often. The best turn in is by far the Nectar. You get 2500 cole each time.
It doesn’t matter which city you do requests at.
Part 3: Synthesis
Alright, now that we’ve finished prep - time to put it all together! I listed the most important materials in the Gathering section, however many items will require other materials that you probably already have or are trivial to acquire. If you don’t remember where to get a certain material, you can usually find it in a shop or the gather location will be listed in the in-game encyclopedia.
For each item, I will only list the important materials. If a material isn’t listed, that means you can put whatever you want there. Also, order matters! You must add materials in the order listed to get the proper awakened effects. When it matters, I will list the awakened effects just to be safe, so that you can easily double check whether or not you did it right. You can see the awakened effects at the bottom right corner.
Before starting this section, make sure you are at least Alchemy Level 40, otherwise some traits may not be transferable. You need to be at least level 43 to finish the game anyways, so it’s not really an unnecessary grind if you aren’t there yet.
And remember, if you can’t find any of the traits on the materials listed, go back to gather at Fire’s Domain until you get them. All of the traits you will need come from there.
Also, you may want to save before starting. Just in case.
Ingredients
Tinc
- (Ore) - Black Ore
- (Fuel) - search for materials with traits “Multiply” and “Max TP Maximization”
- You will probably have these on Eternity Flame, but the exact material isn’t important
- Transfer traits: Multiply, Max TP Maximization
Olgenrium
- Divine Iron Piece x2, Eternity Flame
- You want to search for the following three traits on these materials: Skill Boost, Eco Skill and Max TP Maximization
- (Ore) - Magma Stone
- (Dragon) - Dragon Piece, Dragon Meat
- Make sure to add Dragon Piece first
- Awakened Effects:
- Awakened (Fuel)
- Awakened (Dragon)
- Transfer Traits: Max TP Maximization, Skill Boost, Eco Skill
Living Rope
- (Mystery) - Rainbow Fragment x2
- (Supplement) - Supplement Purple
Scale Cloth
- (Ore) - Divine Iron Piece
- (Thread) - Living Rope x2
- (Supplement) - Supplement Purple
Flour
- Wheat
- trait: Golden Ripples
- (Fuel) - Olgenrium
- Use Boost Item: Blazing Earth Element
- Earth should be maxed
- Transfer traits: Skill Boost, Max TP Maximization, Golden Ripples
Jar of Four Spirits
- Traits: Max TP Maximization, Machine Slayer
- Materials you use don’t matter at all, just find these two traits (probably on Rainbow Fragment)
Healing
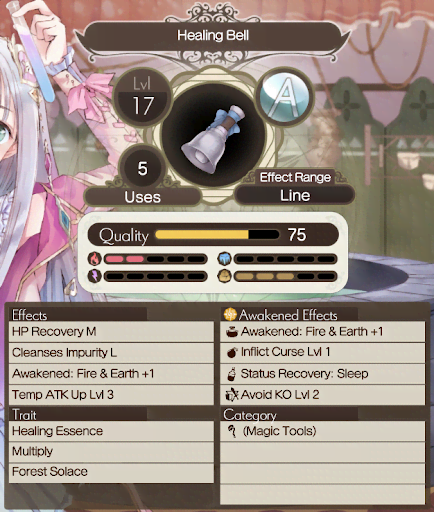
Healing Bell
- Tinc - use the one you made earlier
- (Elixirs) - Ointment Water, Forest Dew
- (Metal) - use the Tinc again
- (Mystery) - Star Piece, Jar of Four Spirits
- Awakened Effects:
- Awakened: Fire & Earth +1
- Temp ATK Up Lvl 3
- Use Boost Item: Twinkle Flower
- Transfer Traits: Healing Essence, Multiply, Forest Solace
Register
Now we’ll go to Chim Dragon to Register some of these items.
Register the following items:
- Healing Bell
- Jar of Four Spirits
- Scale Cloth
- Olgenrium
Sleep for 10 days and they’ll be fully stocked. Purchase the following quantities:
- Healing Bell x5
- Scale Cloth x4
- Jar of Four Spirits x4
- Olgenrium x10
Sleep again and purchase:
- Olgenrium x3
Equipment
Now we can start making the gear! (after one thing)
Komet
- (Mystery) - Dragon Scale, Jar of Four Spirits
- Transfer Traits: Dragon Aura, Max TP Maximization
Black Mist Symbol
- (Metals) - Olgenrium, Flour
- (Poisons) - Rainbow Fragment x2
- Transfer Traits: Skill Boost, Eco Skill, Golden Ripples
Locket of Friendship
- Komet - use the ones you just made
- (Metals) - Olgenrium, Flour
- (Mystery) - Jar of Four Spirits x2
- Transfer Traits: Dragon Aura, Machine Slayer
Gnardi Ring
- (Metals) - Olgenrium, Flour
- (Mystery) - Jar of Four Spirits
- Use Boost Item: Twinkle Flower
Weapons and Armor need to be made at the blacksmith (Smithy in Arland), so head there for the rest.
Create Armor
Dragoon Coat (make this twice)
- (Armor Materials) - Scale Cloth x2
- (Dragon) - Olgenrium x2
- Use Boost Item: Crackling Earth Element
Create Weapons
Direct Illusion
- (Weapon Materials) - Olgenrium x2
- (Mystery) - Rainbow Fragment x2
- search for one of these traits: Skill Charge, Barrage Chaser, Skill +15%
- Use Boost Item: Blazing Earth Element
- Transfer Traits: Skill Boost, Eco Skill, the trait you added from Rainbow Fragment
Valkyrie’s Oath
- (Weapon Materials) - Olgenrium x2
- (Dragon) - Olgenrium x2
- Use Boost Item: Blazing Thunder Element
- Transfer Traits: Skill Boost, Eco Skill
Optional Items
Brave Sigil
- (Metals) - Olgenrium x2
- (Bugs) - Gold Scarab x2
- Use Boost Item: Blazing Thunder Element
- Transfer Traits: Noble Aura
Spirit Necklace
- Purchase from Arland Fair in December
Mystical Ankh
Part 4: Strategy
So the items are finished! Now how does this all work? Well, first thing first, let’s set up the party.
Formation:
- Front Row: Sterk, Rorona, Aurel
- Back Row: Lulua, Piana
Equipment:
- Lulua:
- Interrupt: Healing Bell
- Rest doesn’t matter
- Piana:
- Interrupt: Healing Bell
- Rest doesn’t matter
- Rorona:
- Interrupt: Healing Bell
- Un-equip EVERYTHING - Rorona should not have equipment. Yes, Rorona will die. A lot. This is intentional.
- Exception: if you made the optional items (Brave Sigil and Spirit Necklace), then equip them as her accessories. These help her die more.
- Sterk:
- Equip all of the gear you made
- Aurel:
- Equip all of the gear you made
- Tools:
- Healing Bells
- Mystical Ankh if you made it
If your characters aren’t level 50, it’s easier if you grind that out first. I don’t know where the best spot to level is. The bosses are still doable at lower levels, but level 50 unlocks ultimate attacks which do a lot of damage.
Now, for the actual combat strategy:
In general, your party will be at low HP almost the entire time with this set. This is okay. For the most part, Sterk and Aurel won’t die very often (they will survive with 1HP due to the amount of Avoid KO Stacking).
Use Interrupt Healing bells when one of these conditions is met:
- Anyone dies
- Sterk or Aurel is at 1HP
- You need to cleanse debuffs
Don’t use them otherwise really, it’s unnecessary. You can also use healing bells manually with Rorona to make sure the interrupts are up when you need them.
Now, what to do for each character’s turn:
Sterk: Use skill “Astral Caster”
Rorona: Attack, Healing Bell if you need to. She can throw bombs instead of attacking if you have them (they aren’t covered in this guide). You can use her Ultimate Skill Spinning Synthesis Classroom if you need to recover Sterk/Aurel MP.
If you made a Mystical Ankh, you can use it on Aurel/Sterk if they ever get stunned to break them out of it.
Aurel: Most turns you will use normal attacks. Use his skill “Resting Spirit Stance” before using his ultimate. When your ultimate gauge is full (it will fill up quickly!), then use his ultimate attack skill Scorching Heavy Snow.
If you get unlucky and your entire front row dies at the same time, it’s possible to recover. Keep in mind that this is an uncommon occurrence - if it does happen, it just means you got unlucky on that attempt and oh well. You can use healing bell interrupts to revive your back and front rows, then switch lulua and piana out once everyone is revived. Or if you die just go back and try again I guess. This likely will not happen but it is possible, so just putting a warning for that here.
Last Updated: November 14, 2024