
I’m gonna be honest with you; this is going to be a boring set, and it’s not the most fun to play the game this way. But if you’re stuck, this will get you through the bosses without much effort.
What equipment do you need? Any old junk; just be sure to upgrade your weapons to the highest tier available (traits and effects don’t matter, you’re after the item slots they give). Armor, accessories, get ‘em from chests or shops. I’m not even joking; this is going to be a gimmicky as hell item set that abuses the hell out of knockback and stun. If you actually want to bother with equips, max out your ingot/cloth effects, cram as many into your items as your sanity allows and fix your effects/roles during item rebuild. That should be good enough for the standard difficulties. You probably do not need to do recipe morphing on equips before duplication, but the option exists.
How To Use
Put each of the items you made in slot one for each character you intend to use in battle. Put literally anything else in the other slots; garbage usable items are fine. This is a win or die set, not a scrape by and heal set.
When you enter battle
- Mash the item button and use items as fast as possible
- Use the shoulder buttons (or equivalent) to take control of the next character on the timeline
- Have that character use an item. Repeat until you’re out of CC.
- Now use a quick action (you may have to wait for an animation to finish) and convert one of your garbage items to CC
- Continue item spam
- Do not increase tactics level; you are not supposed to attack often (you will mostly do it because you couldn’t switch in time) or use skills. Your tactics will rise automatically as you break enemies. You may be allowed to increase the first tactics level, but no further.
This is how you win any battle the cheeseball way; the process remains the same, but the items upgrade.
Boss at Meteor Castle
- Ice Bomb x2
- Ice Damage M
- Slowdown S
- Trait: Rather Devastating
- Craft
- Physical Damage L
- Exploding Spikes L
- Trait: Rather Devastating
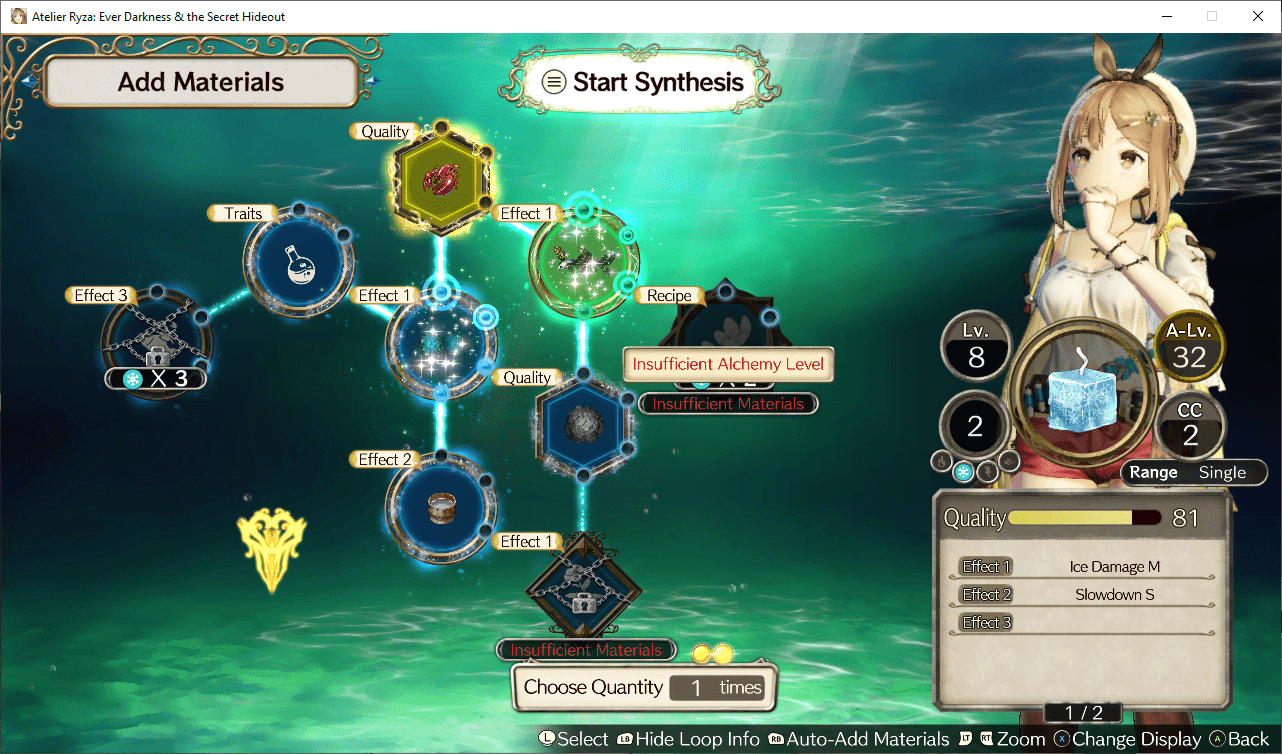
Rather Devastating is a fairly common trait at this point and is one of the few that will be useful to you. Curse Strength / Protection, or anything else you get, is gravy. If you can’t get either trait, don’t worry. Both of these sets should be fairly straightforward to create; refer to this page for more information on the basics if you need it, and I gave an example of what the Ice Bomb should look like. Just don’t hold back on your decent mats.
The very important thing to note is that you should not exceed the equip level of whoever is intended to equip the item. For Lent (and thus a Craft), this may be a low value such as 11. If you don’t have Physical Damage M on the Craft before rebuilding, you’ll probably exceed 11 during rebuilding.
To avoid this, start from Explosive Uni and recipe morph your way to the Craft. This will lower the level of the Craft to to Explosive Uni's level, as well as give you more items to put in the Craft to reach the higher effects easier.
Boss at Liese Valley
Now you can make the most broken item for most of the game: Lightning Bell. Paralysis, Stun Gauge damage, and turn delay all in one evil package.
You will want to start with a B rank Plajig, so you only have to use one item, as well as two B rank Staltiums. Remember, rank is a combo of traits and quality, regardless of whether traits are activated. So use your better stuff, throw some traits on, and you should be good. Prioritize filling out effects on your Bell; in particular you want Thunderclap L and Thunder Current. Ignore Multi-Order until you’ve done everything else.
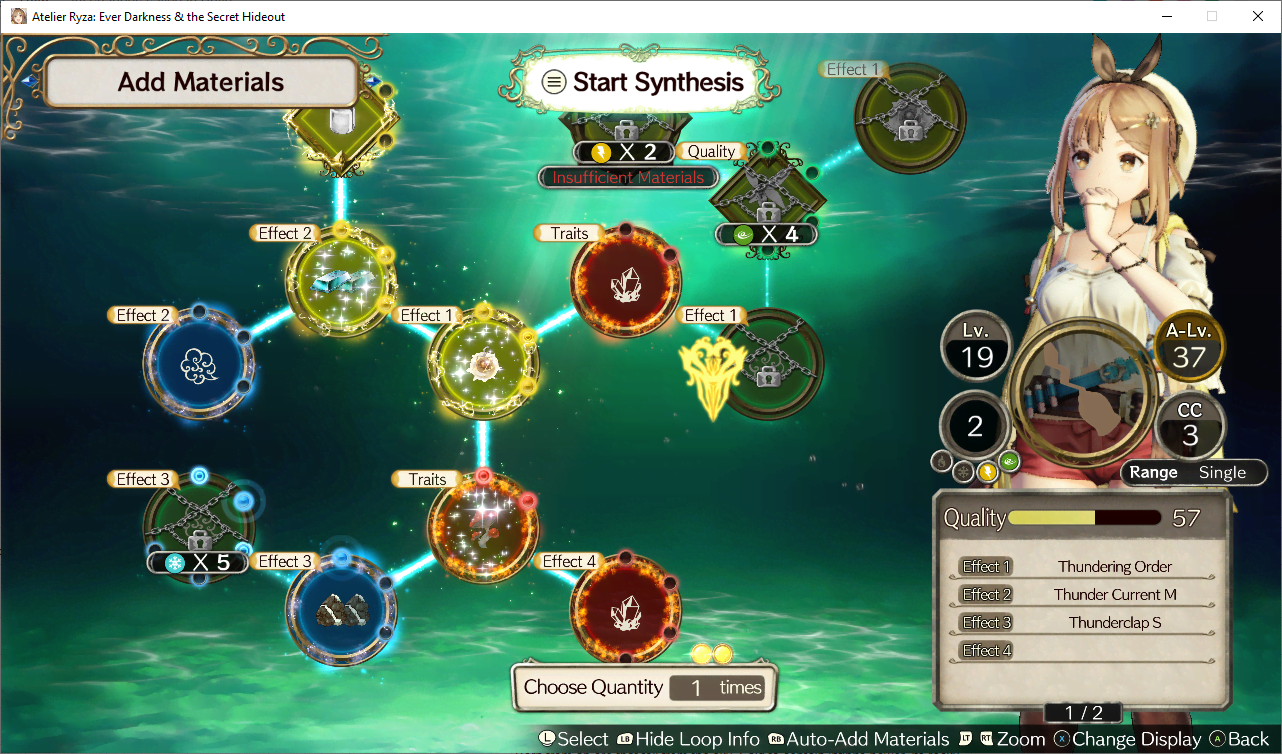
Your item should be pretty similar to this pre-rebuilding. The further you get, the better you’ll be. This will pretty much have to be an item for Ryza, but you can continue to add bells and whistles as the game goes on if you aren’t a high enough alchemy level for this. CC -1 is nice to have, but actually not necessary. Traits still aren't super important, so if you manage Rather Devastating you’re going to be fine.
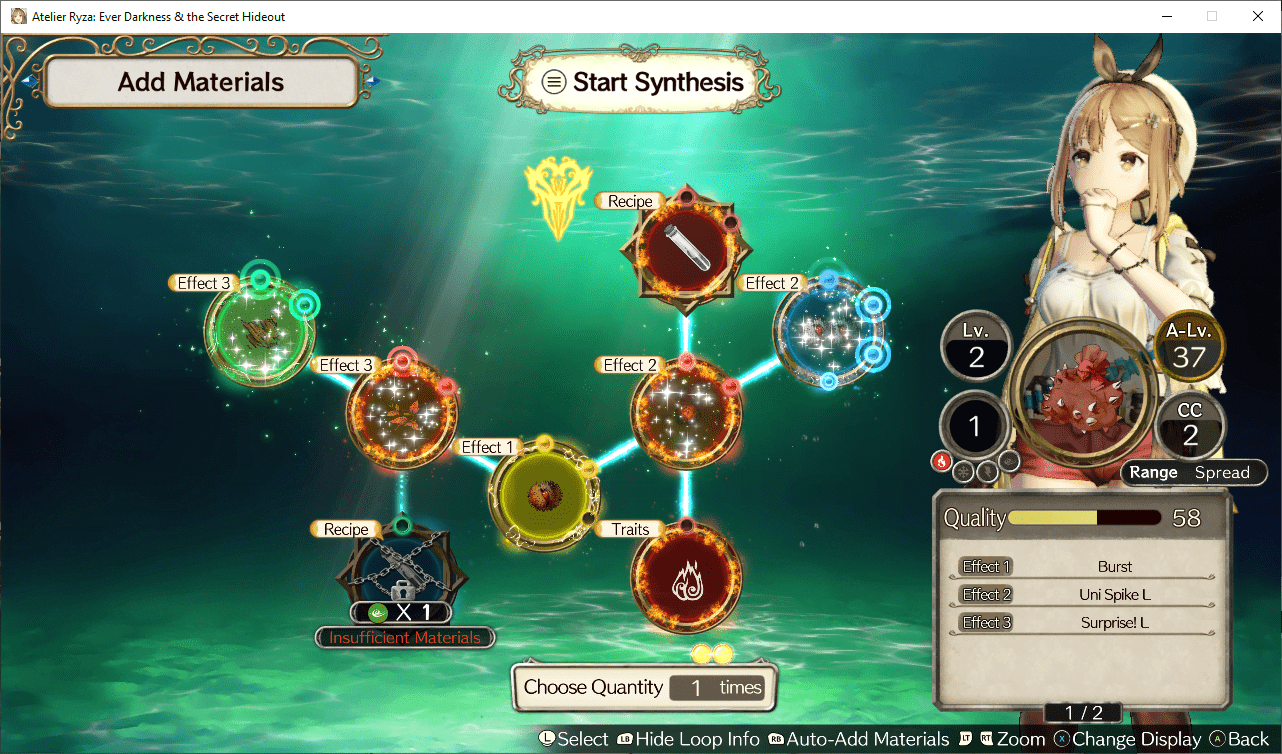
This is a callback to an earlier part of this guide, but the second thing you can do for lower level items is a Craft.
If you need to sacrifice Uni Spike L or Surprise L, do so, but don’t bother picking up traits over effects. From here, throw the supplement in to start the Craft…
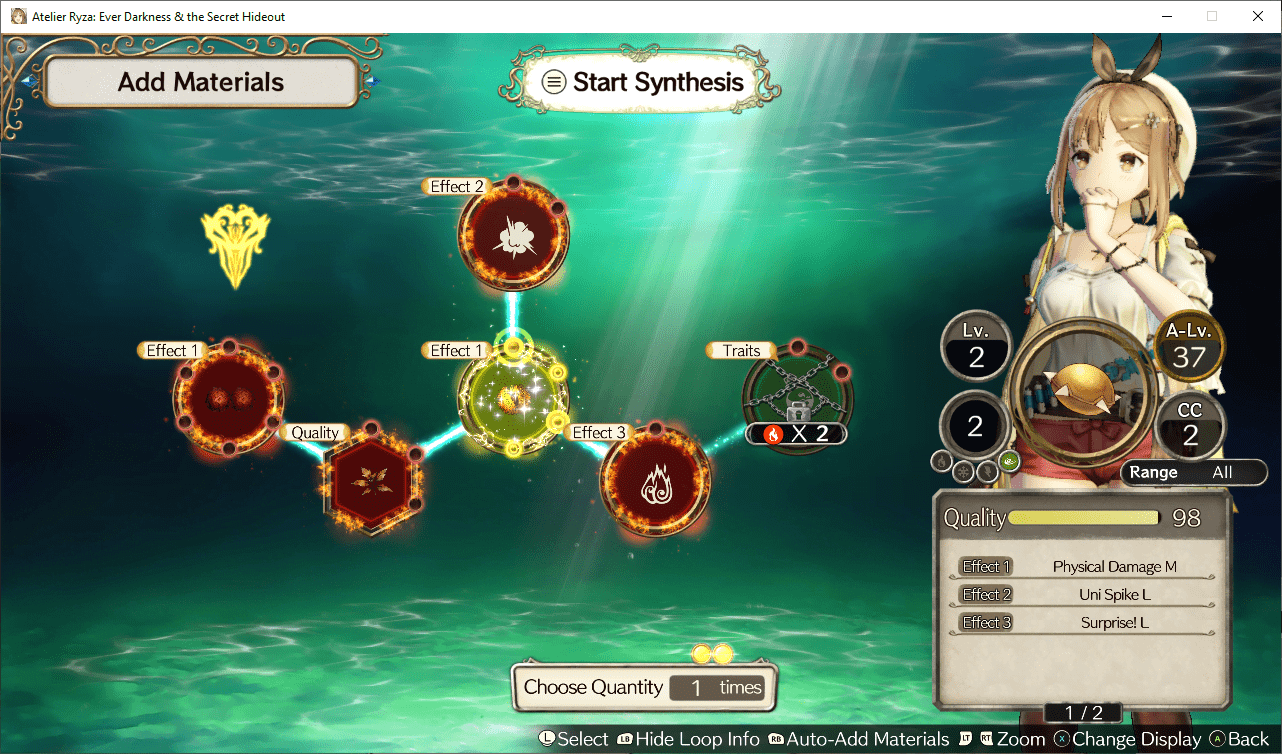
Avoid the top and right paths like the plague. Just do your best to fill up Physical Damage, including in item rebuild.
Final Boss and Beyond
- Lightning Bell
- Summon Thunderbolt
- Thunder Current L
- Thunderclap L
- Trait: Destructive++ Lv.50
- Trait: Few Bonus++ Lv.20
- Trait: Few Bonus+ Lv.15
Another boss, another Lightning Bell abuse. The only real difference here is that the traits are worth a crap and the quality is higher. By this point you’re probably familiar enough with the song and dance; max out the effects, nab CC -1.
Also, you’ll want a Norden Brand or something for the one optional boss that resists lightning. You can guess which distinctly elemental boss that might be, and it might be in a tower.
Again without Multi-Order, because it’s unnecessary. You’ll need one of these for each character (which, indeed, dictates what your party will be).
To get the traits for this, you’re going to need to use a Mirage Loupe or a Loupe Compass with maxed effects. Once you have that, pick your favorite late game places and gather until you have everything.
If you don’t know how to max your trait levels (it's very important that you do, otherwise your items will be hot garbage), what you do is find some easy synth loops you can do. Supplement -> Zettel -> Traveler's Water Orb is one such loop. So, let's say you get a Destructive++onto a supplement, but it's level 2. Next step is to put as many as you can into a Zettel (use duplication if you want). We'll suppose you used 3 as an example. Since you used 3, you now have a level 6 trait. Now let's say you tossed three of those into the water orb... that's a level 18 trait now. And so on. Repeat until max.
Last Updated: November 13, 2024